Line Controls and Size
 | You can use the options on the Line tab to make lines a specific length or position them on a specific angle. |
|
|
You can move a line by dragging from the middle of the line. You can change a line by dragging the handles at the ends of the line. If you have Snap to Content turned on, the handles of the line will snap to other objects, making it easy to create diagrams and flow charts. |
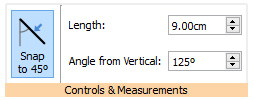
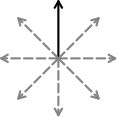 |  | If you have Snap to 45° turned on, when you move the handles of a line, the line will snap to all the 45° points. |
|
|
You can change the length of a line manually by selecting and dragging it to a larger or smaller size. You can also use the Length box on the Line tab. Click on the line to select it, then type in the Length box, click the up and down arrows or click in the box and press the up and down keys on your keyboard. Line length is specified in cm/mm. |
|
|
You can change the angle of a line manually by selecting and dragging one of the handles to a different position. You can also use the Angle from Vertical box in the Line tab to change the angle. Click on the line to select it, then click the up and down arrows in the Angle from Vertical box to increase or decrease the angle of your line from vertical. Alternatively you can type the angle value directly into the box. |
  | 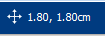 | You can lock the size and position of a line by clicking the Measurement and Locking button on the Page Status Bar at the bottom of the screen. |
|
|
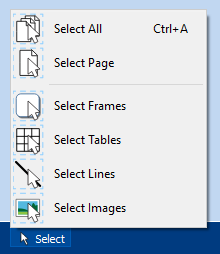
You can select all of the lines in the entire document. This can be particularly useful for changing the appearance of all lines at once. On the Page Status Bar at the bottom of the screen, click Select then Select Lines. Note: When you select objects over multiple pages, you cannot move or resize them, only change their appearance. |