Tab Stops

Tab Stops can be used to enable InPrint 3 users to align text by pressing the tab key. Tab Stops can be added to paragraphs in document frames or table cells.
By default, paragraphs in new frames and cells have tab stops every 1.5cm.
Tab Stops can be used to enable InPrint 3 users to align text by pressing the tab key. Tab Stops can be added to paragraphs in document frames or table cells.
By default, paragraphs in new frames and cells have tab stops every 1.5cm.
|
|
To add a Tab Stop you first need to select the frame or cell you want it to apply to. Then click on the Horizontal Ruler at the top of your document. When a Tab Stop is added, it is represented on the Horizontal Ruler with a blue Tab Stop indicator. |
Note: A Tab Stop will only be applied to the selected frame or cell.
|
|
To move a Tab Stop click and hold on the blue Tab Stop indicator on the Horizontal Ruler. This will show a temporary guide line across your document, indicating the position of the Tab Stop. Drag the indicator left or right to move the position of the Tab Stop, release the mouse button when it is in your desired position. |
|
|
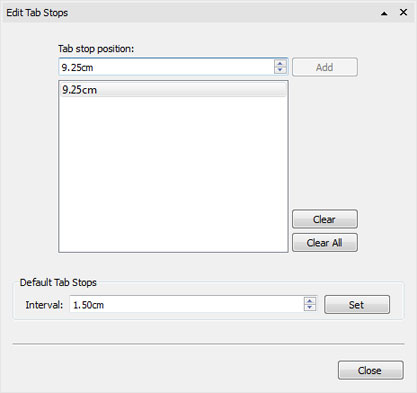
To remove a Tab Stop click and hold on the blue Tab Stop indicator on the Horizontal Ruler, then drag downwards. Alternatively you can double-click on the blue Tab Stop indicator to display the Edit Tab Stops dialog box which can be used to remove or change the position of the Tab Stop(s). |