Table and Cell Styling
You can edit the properties of a selected table cell and change its appearance on the Cells tab.

You can edit the properties of a selected table cell and change its appearance on the Cells tab.

You can select different parts of the table:
|
|
Click the Line Colour or Background Colour buttons to choose an alternative colour from the basic colour palette. Click the More Colours option to select a custom colour. Drag the transparency slider to make the colour solid or transparent. More about the Colour Palette. |

To change the line thickness, type in the box, click the up and down arrows or click in the box and press the up and down keys on your keyboard. Line thickness is set in mm.

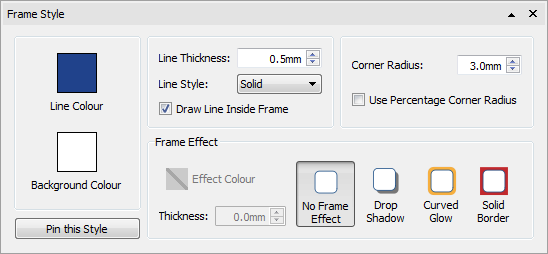
You can set the line to be drawn Inside or Outside the cell boundaries. By default, the line is drawn outside the cell boundary. To change this, click the More Options  button in the Styling section of the Cells tab to open the Frame Style dialog. Then tick Draw Line Inside Frame.

To change the corner radius of a cell, type in the box, click the up and down arrows or click in the box and press the up and down keys on your keyboard. Corner radius is set in mm. A corner radius of 0mm will mean that the cell has square corners.

You can also set the corner radius as a Percentage. You can use this to create a round cell by setting the corner radius to 100%.
To set the corner radius as a percentage, click the More Options  button in the Styling section of the Cells tab to open the Frame Style dialog. Tick Use Percentage Corner Radius.
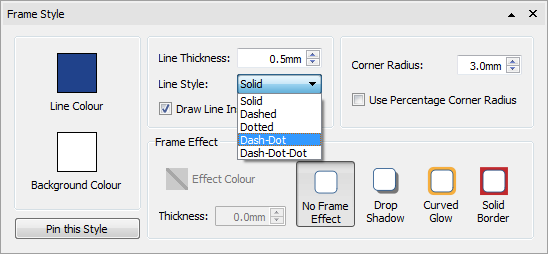
To change the appearance of the table line style, click the More Options  button in the Styling section of the Cells tab to open the Frame Style dialog.
There are 5 Line Styles to choose from.


|
|
You can add a drop shadow and various other effects to a table cell. To add a drop shadow, click the Drop Shadow button. |
To change the appearance of the drop shadow or access different effects, click the More Options  button in the Styling section of the Cells to open the Frame Style dialog.

|
Setting Frame effects In the frame effects dialog you can set:
For each of these you can set the effect:
|
|

|
|
When you have styled your table, you can 'pin' its style so that you can create more tables with the same style. To do this, right-click on the table and select Pin this Style. To create a new table using the pinned style, select Use Pinned Style from the new table drop-down on the Create toolbar. InPrint 3 will remember the table style that you have pinned until you pin a new one, even if the program is restarted. |
