Tips for InPrint 2 Users
InPrint 3 can be used to make all of the same resources as InPrint 2 but in much faster and simpler ways. Below is a list of common features found in both versions with an explanation of what's new.
Creating a Table
InPrint 2
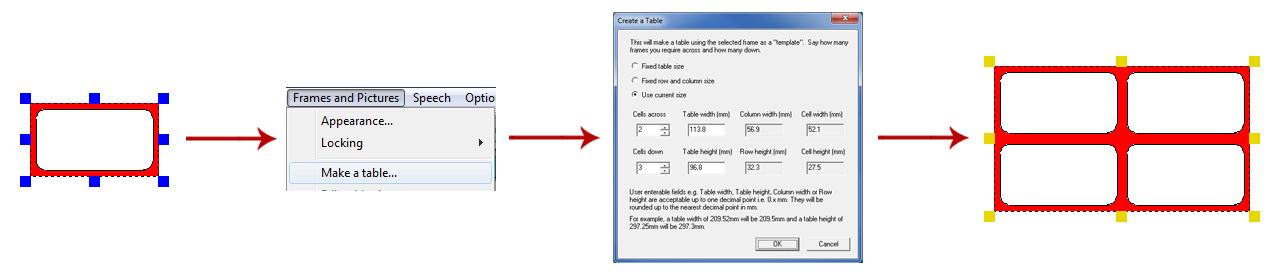
To make a table with InPrint 2, you had to create a frame, then select the option to turn it into a table from the 'Frames and Pictures' menu. From there, you could specify the number of rows and columns and other properties of the table.
InPrint 3
With InPrint 3, creating tables is far simpler and much quicker.
|
|
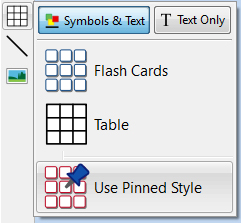
To create a table, click the Table button on the Create toolbar on the left of the screen.
From the Table menu that appears, you can:
|
|
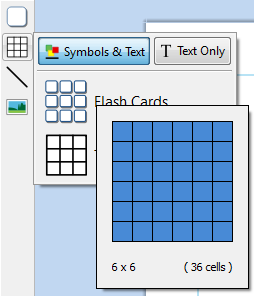
|
When you have selected the type of table that you would like to create, the table creator will appear under your mouse pointer, showing you the number of rows and columns and the total number of cells that will be created.
Drag the table creator to the dimensions you require and click once to confirm your choice. A preview of the table will be attached to your mouse pointer so that you can see exactly where it will be when you click to place it in on the page.
|
InPrint 3
InPrint 3 has simplified this process with all the above options as well as the new 'Pinned Style' feature available at the click of a button.
|

|
To create a frame, click the Frame button on the Create toolbar on the left of the screen.
From the Frame menu that appears, you can:
Choose the content mode of your frame from Symbols and Text or Text Only-
-
One you have created your frame, you can change its Sizing Type, which controls the way that the size of the content behaves as you type.
|
Grow to Fit
InPrint 2

With InPrint 2, users had the option to use the 'Expand to fit' button to make the text and symbols they had used as large as possible in the frame. This was a useful feature if one of the fixed writing frames had been resized and its content looked relatively small.
InPrint 3

InPrint 3 includes new Sizing Types for frames, tables and speech bubbles to give you greater control over how their content behaves:
The content shrinks and grows whenever an object is resized with Contents Fills Frame
The content tries to remain at your preferred size with Content Shrinks
The object grows as you type with Frame grows with Content (not available for tables)
Content that does not fit in the object is hidden with Frame is Fixed
Changing Between Symbols and Text and Text Only Mode
InPrint 2
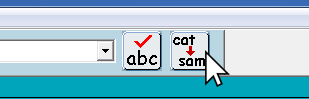
With InPrint 2, the content mode of a frame or table could be changed at any time by clicking the toggle button on the right-hand toolbar:
 | Indicated the paragraph was in Symbols and Text mode. |
 | Indicated the paragraph was in Text Only mode. |
Alternatively, users could use the F10 key to toggle between the two modes when an object was selected.
InPrint 3
|

|
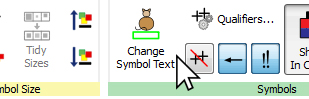
With InPrint 3, users can switch between the two modes using the options on the dynamic tab associated with the selected object. For example, if you have a Frame selected; the Contents option will be on the Frames tab. If you have a speech bubble selected, they will be on the Speech Bubble tab.
Alternatively, users can still use the F10 key to toggle between the two modes when an object is selected.
|
Search for a Symbol
InPrint 2
 | InPrint 2 gave users the option to search for symbols on the Use list tab at the top of the graphic resources section. |
InPrint 3
 | InPrint 3 lets you search directly from the Symbol Chooser on the right of the screen.
When you've found the symbol that you want to use, click on it to select it and then click on the page to add it to your document. |
Copying and Pasting to a New Page
 | In InPrint 2, if you copied an object and pasted it on a new page, it was added in the same position.
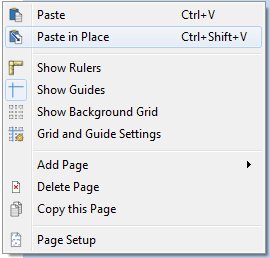
In InPrint 3, you can right-click anywhere on the new page and select the ‘Paste in place’ option from the context menu.
If you select the 'Paste' option from the context menu in InPrint 3, the object will be attached to your mouse pointer so that you can choose exactly where to place it on the page. |
Headers and Footers
InPrint 2
InPrint 2 used a feature called 'master items' to allow you display the same object on multiple pages.
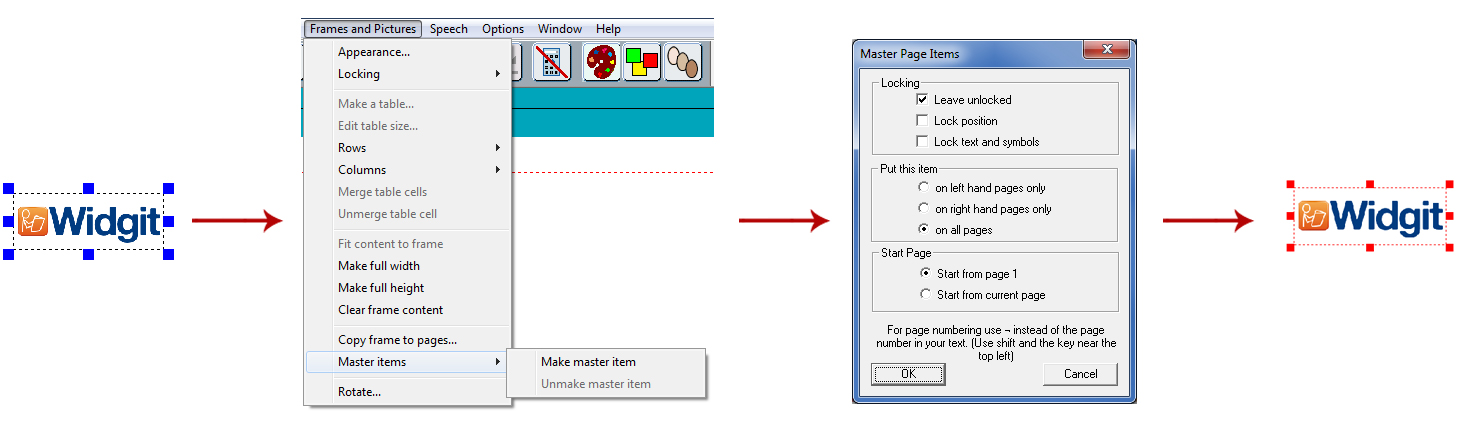
To make an object a 'master item', you had to select it, then go to the 'Frames and Pictures' menu and select the 'Make master item' option. You could then choose if the object was going to be editable, which page it would start to appear from, and whether or not it appeared on odd or even pages.
InPrint 3
In InPrint 3, you can use Headers and Footers to make objects appear on every page, on odd or even pages, or on a specific group of pages. If you want an object to appear on every page outside of the header and footer, you can add it to a template.
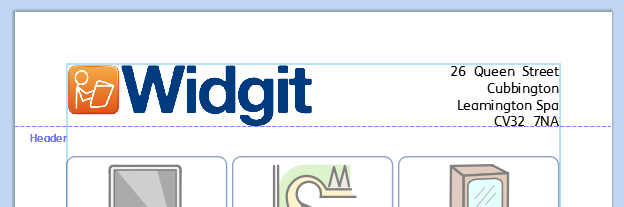
 | You can show the header and footer during editing by clicking Edit Header and Footer on the Pages tab. |
Adding Page Numbers
InPrint 2
InPrint 2 used a feature called 'master items' to allow you display page numbers.
To add page numbers to InPrint 2 documents, you had to create a frame and type the “¬” symbol (top-left on your keyboard) to act as a special placeholder for the number of the current page. To make an object a 'master item', you had to select it, then go to the 'Frames and Pictures' menu and select the 'Make master item' option.
InPrint 3
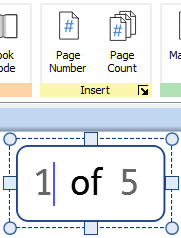 | With InPrint 3, you can add page numbers to any frame using the options on the Pages tab.
Press the Page Number button to add the number of the current page.
Press the Page Count button to add the total number of pages. For example “Page 1 of 5”. |
Note: To display page numbers on all pages, add them to a frame in the
Header or Footer.
Select All
To make changes to multiple objects at the same time with InPrint 2, users first had to drag around all objects to select them.
|
|
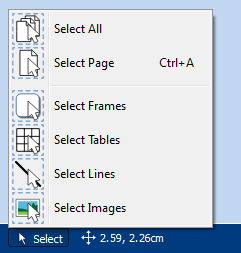
In InPrint 3, you can use the Select tools on the Page Status Bar to select objects throughout the whole document. This can be particularly useful for changing the style properties of all items at once. You can select:
|
Note: When you select objects over multiple pages, you cannot move or resize them.
Smart Symbolising and Wordlists
InPrint 2 used wordlists to link the words you typed with a symbol. The symbols displayed when you type would vary according to the loaded wordlist(s) in InPrint 2.
By default, InPrint 3 uses a new smart symbolising system. When you type with symbols, the ‘smart symboliser’ analyses the words in the sentences and picks the correct symbol accordingly.
For example, if you type “drink your drink”, the symboliser will pick the verb form for the first “drink” and the noun form for the second.

With each software update, more Widgit Symbols and vocabulary will be added, ensuring that you always have the largest and most up-to-date vocabulary.
InPrint 3 still uses wordlists for resource packs, special vocabulary and third party symbols.
Topic Wordlists
Alongside the smart symboliser, you can choose to load a topic wordlist for specific or personalised vocabulary.
Symbol Set Wordlist
If you have purchased a third party symbol set such as Makaton to use with InPrint 3, it will be available as a symbol set wordlist
Opening InPrint 2 Documents

InPrint 3 will open any of your old InPrint 2 documents (.cip files) and give you the option to save them in the latest file format (.ipdoc).
To open an existing document, click the Open button on the File tab. From here you can choose to open .ipdoc files or .cip files. Double-clicking on a .cip file will import your old resource into InPrint 3 and allow you to edit it as you would any other file.
You can also open .ipdoc files or .cip files by dragging them into InPrint 3 from Windows Explorer.
Select Save As from the File tab to save the document as a .ipdoc file.
Opening InPrint 2 Resource Packs
InPrint 3 will open any of your InPrint 2 resource packs.
Click the File tab and click the Resource Packs button. To view the InPrint 2 resource packs installed on your machine, click the View Legacy Resources button at the bottom of the screen.
Double-clicking on a .cip file will import your old resource into InPrint 3 and allow you to edit it as you would any other file.
Select Save As from the File tab to save the document as a .ipdoc (InPrint 3 file). Please note that you cannot open .ipdoc files in InPrint 2.
If you have any problems opening your InPrint 2 files, please contact technical support:
T: 01926 333686
E: [email protected]